Overview
Lookup fields are used in Jet Data Manager to add a field to a table in order to retrieve the value of the field in another table. The process of adding a conditional lookup field consists of a number of steps described below.
Creating the Lookup
- Expand the preferred business units and then expand the staging database.
- Expand the tables with the staging database and select the table you wish to modify.
- Right-click the table and then select Add Condition Lookup Field
Adding the Conditional Lookup Field
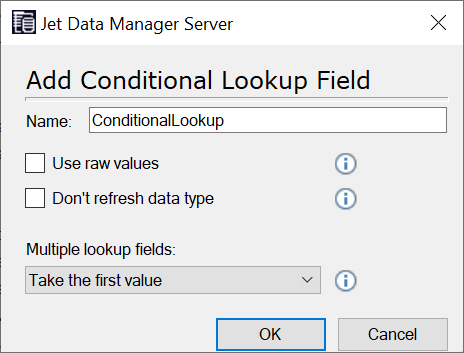
- In the Name field, type a name for the lookup field.
- In order to perform the lookup on the raw values of the source table instead of the valid values, select Use raw values. Lookups are always inserted into the raw destination table.
- In order to change the conditional lookup field’s data type manually, Don’t refresh data type must be checked. If this option is not checked (default), the data type will be synced with the first lookup field and refreshed when the first lookup field changes.
- Multiple lookup fields declares what Jet Analytics will do in case there are more than one lookup field on a conditional lookup field. The lookup fields are evaluated in the order in which they appear in the tree unless there is a match. In such a case there are two scenarios. Either we select the value of the first lookup field with a condition that evaluates to true as the value of the conditional lookup field, or we select the value of the first lookup field that evaluates to true and is not empty.
- Click OK. The field is added to the project tree under the selected table.
Specifying the Lookup Field
The next step is to specify the field to be used as lookup field. You can add multiple lookup fields to one conditional lookup field.
Expand the field, and then right-click Lookup Fields. Click Add Lookup Field.
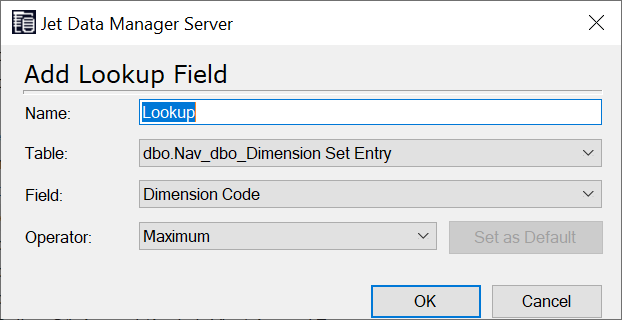
- Name – type a name for the lookup field.
- Table – select the table containing the field you wish to use.
- Field – select the field you wish to use.
- Operator – specify how to return the values. You have the following options:
| Option | Description |
| Top | Returns value from the first record matching the join criteria. A Sorting node will be added to the project tree under the lookup field after selecting this operator. Right click this and click Add Sorting to define how the matching values are sorted before they are retrieved from the source table. |
| Sum | Returns value from the first record matching the join criteria. A Sorting node will be added to the project tree under the lookup field after selecting this operator. Right click this and click Add Sorting to define how the matching values are sorted before they are retrieved from the source table. |
| Count | Returns a count of all the values that match the join criteria while ignoring the Null values. |
| Maximum | Returns the highest value among all the values that match the join criteria. For strings, it will find the highest value in the collating sequence. Null values are ignored. |
| Minimum | Returns the lowest value among all the values that match the join criteria. For strings, it will find the lowest value in the collating sequence. Null values are ignored. |
| Average | Returns the average value of the values that matches the join criteria. This will only work on numeric values. Null values are ignored. |
Click OK.
👉 Join our Jet Data Manager Training and learn to build, manage, and automate your data warehouse with ease.
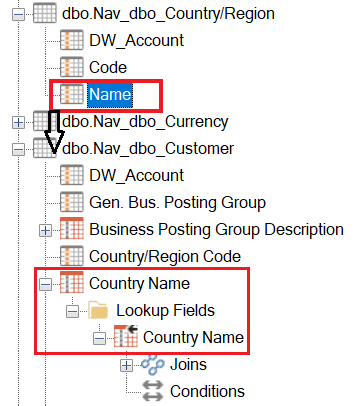
Dragging and Dropping the Lookup Field
You can also drag a field from one table and drop it over the name of another table. This will create the conditional look up field, but we still need to add joins. Adding joins are covered below.
Adding Joins
Next step is to join the source table with destination table using similar columns. Less complex joins will make the lookup perform faster. To get the best performance, use one single numeric field for the join.
- Expand the lookup field, right-click Joins, and then select Add Join.
- On the Add Join dialog…
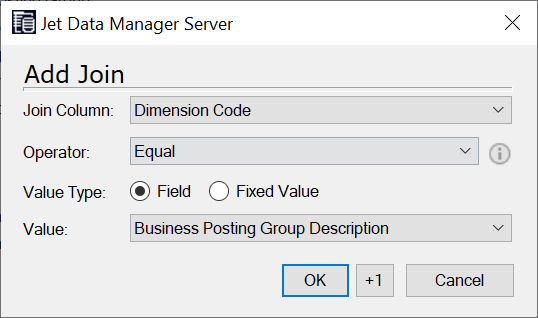
- Join Column – select the field that uses the lookup.
- Operator – specify when to look up a value.
- Value Type – Click Field or Fixed Value to specify if you wish to compare the field selected in the join column list to a field on the destination table or a fixed value. The Value box changes to fit your choice.
- Value – Depending on your chosen Value Type, click the relevant field in the Value list or enter a value in the Value box.
- Click OK.
Specifying Conditions
You can specify conditions for the lookup. The lookup takes place when the condition evaluates to true. Below are steps to add conditions to a lookup field.
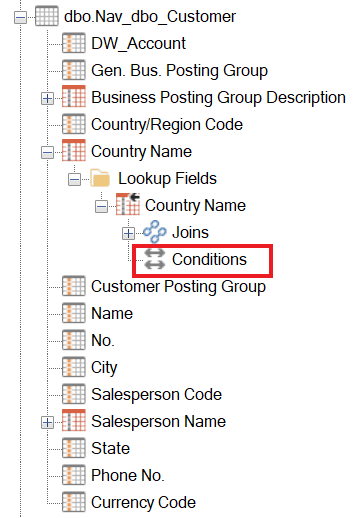
- Expand the lookup field, click Conditions.
- In the Conditions pane…
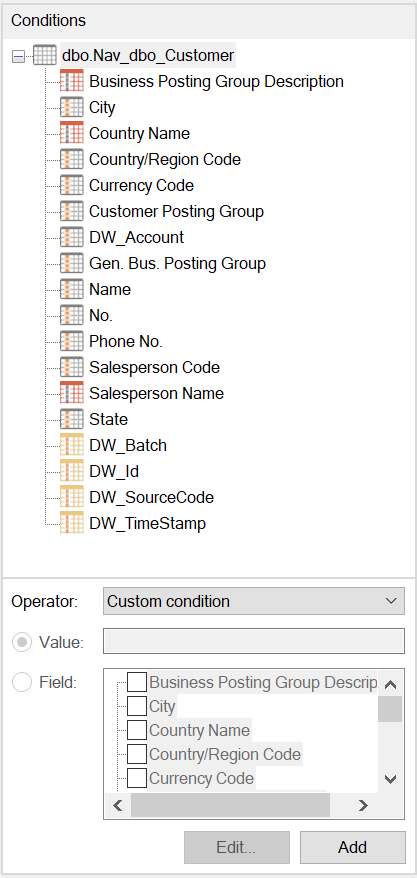
Specify the following
- Select the field to be used in the comparison from the upper section.
- In the lower section of the pane, select the Operator you wish to use.
- Value or Fields – Click Value and enter a value to be used in the comparison in the box
or
Click Fields and select a field from the list to use for the comparison. - Click Add


