Overview
Execution packages are used to update the staging database, data warehouse, and OLAP cubes on a scheduled basis. You can also set Notifications to alert specified individuals when the execution package has successfully run.
Creating a Notification
Notifications are set to alert specified users whether the execution package has run successfully or failed to execute. These notifications are set up as email alerts but can be saved to the Event Log as well.
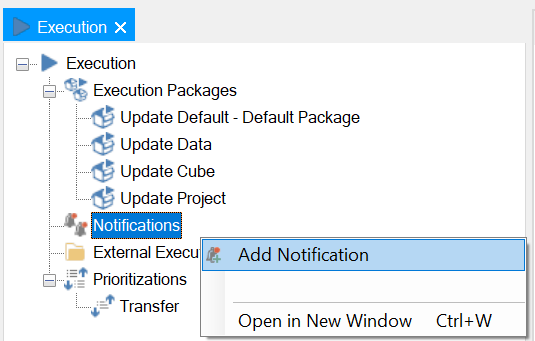
- Using the Solution Explorer open the Execution tab, right-click Notifications, and then select Add Notification.
A window will appear with the following settings:
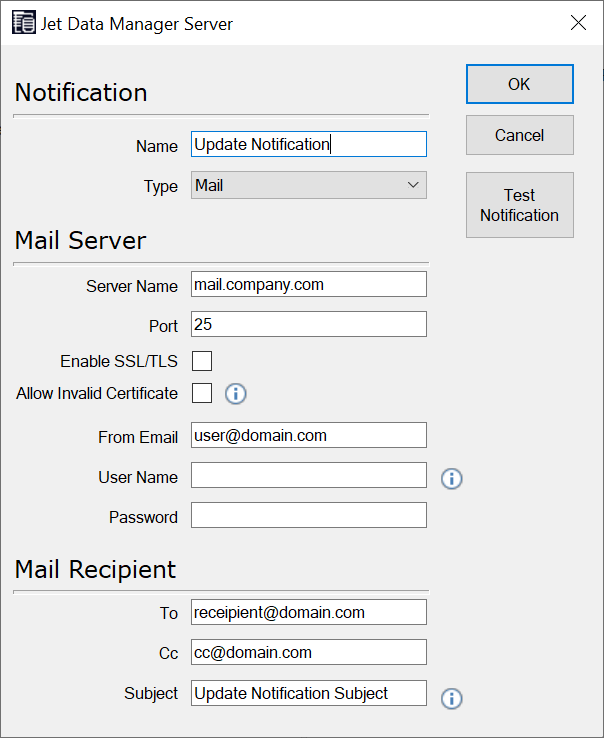
- In the Name field, type a name for the notification.
- In the Type field, select the type of notification you want to create. You have the following options.
| Option | Description |
| Creates an email notification | |
| Event Log | Writes a notification to the event log |
| Both | Creates both an email notification and writes to the event log |
Type the name of the mail server you want to send the email from, using the Mail Server Name field. In order to maintain a secure server, you can enter a specific Port as well as a User Name and Password.
Note: SMTP is currently the only supported email method.
- In the From email field, type the email address using which you want to send the notification from.
- In the To email field, type the email address you want to send the notification to.
- In the Cc field, type the email address you want to send a copy of the notification to
- In the Subject field, it is possible to use parameters in order to define the subject of the email. The accepted parameters are:
| Parameter | Description |
| %Project% | Inserts the name of the project |
| %Status% | Inserts the status of the execution package (Success/Fail) |
| %ExecutionPackage% | Inserts the name of the execution package |
- Check the box Enable SSL/TLS if required.
- Check the box Allow Invalid Certificate, if an invalid SSL certificate has to be trusted.
- Click OK
The notification can now be selected when you create an execution package.
👉 Join our Jet Analytics Training and master building data warehouses, cubes, and advanced dashboards.
Creating an Execution Package
An execution package determines the elements of a project which will be executed.
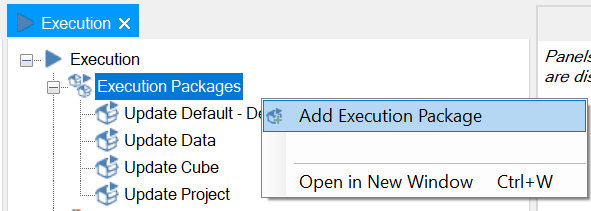
- Using the Solution Explorer open the Execution tab, right-click Execution Packages, and then select Add Execution Package.
- Type a name for the Execution Package in the Name field.
- Click and drag the Execute Project level from the All Steps tree on the left and drop it in the Selected Steps window on the right.
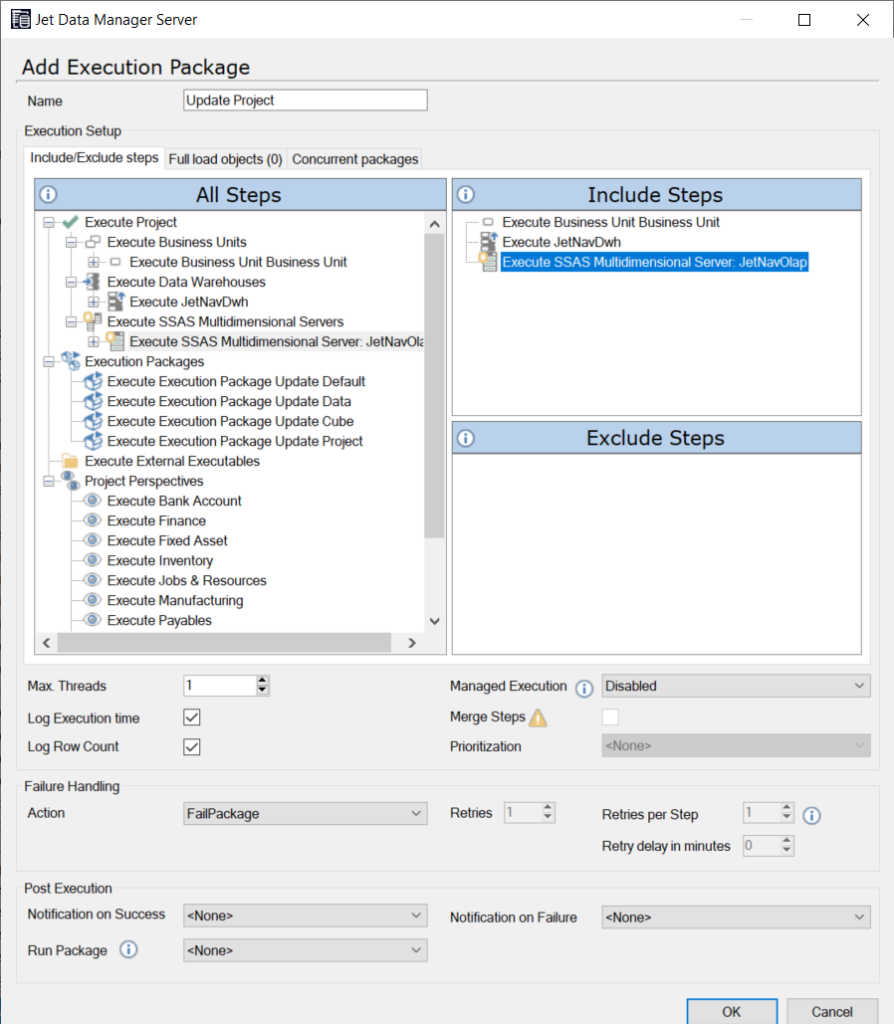
- In the Action field, specify the action to perform if the execution fails. You have the following options:

| Option | Description |
| FailPackage | Cancels the execution in case of failure |
| RetryStep | Executes the package again in case of failure |
You can specify in the Retries field how many times you want the execution package to restart, and then in the Wait field you can specify the number of minutes to wait before retrying again:
- From the Notification on Success / Notification of Failure section, select the notification to use when the execution package succeeds or fails. In this example we are only being notified if the execution package fails.

- In the Managed Execution drop-down, select a managed execution method.
When enabled the execution package will be managed internally, meaning the application will decide the order in which objects are executed based on dependencies and the degree of parallelism specified by the Max Threads setting.
You have the following options:
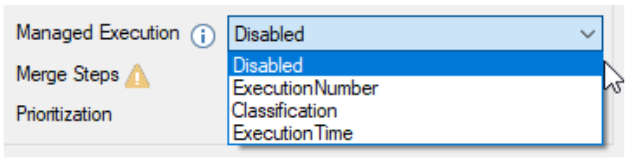
| Option | Description |
| Disabled | No managed execution will take place. |
| Execution Number | Based on the order of the objects in the project tree. The higher in the tree the sooner the execution. |
| Classification | The JDM will choose the order of objects based on their table classification: The order will be 1) Fact Table – Large 2) Dimension Table – Large 3) Fact Table 4) Dimension Table If two tables have the same classification the JDM will use the Execution number as the secondary Criteria. |
| Execution Time | The JDM will choose the object based on the average historical execution time for the object. If two objects have the same average execution time (i.e., new objects), then the JDM will use Execution Number as the secondary criteria. |
- Select the maximum number of tasks for the JDM to run in parallel, using the Max Threads box.

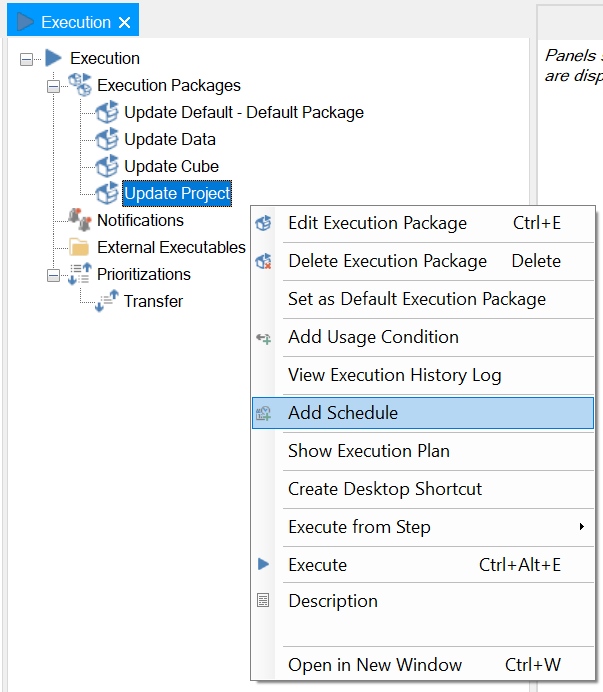
Specify an Execution Schedule
Projects can be executed at different times depending upon your schedule. When you specify an execution schedule, the execution process is started automatically at the specified time.
- Using the Solution Explorer open the Execution tab, right-click the Execution Package to which you want to add a schedule and select Add Schedule.
The following window will appear:

- Click the Daily radio button.
- The Frequency option will allow the user to set the time during which you want to execute the project throughout the day. This will run the execution at a specified time period.
- In the Start time field, enter the start time of the time interval.
- In the End time field, enter the end time of the interval.
- In the Run every field, specify the number of hours and minutes between each project execution.
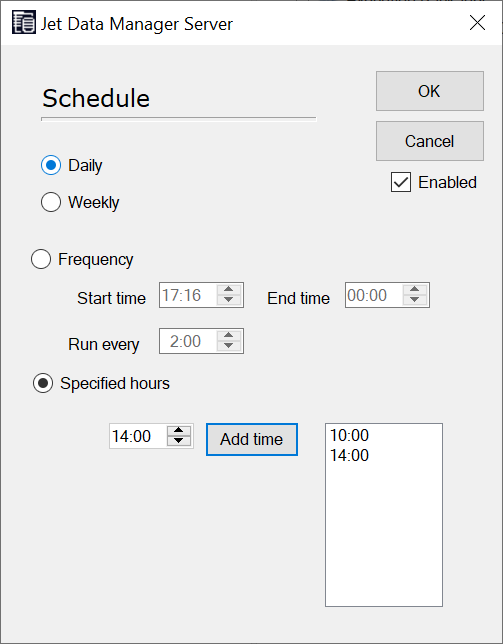
- The Specified Hours option will allow the user to select the exact time at which the package will be executed.
- If using Specified Hours, enter the exact time for the execution to run and then click Add Time. The example above will run the package at 10:00AM and 2:00PM.
- Select Enabled to activate the schedule, and then click OK.
Committing Execution Package Changes
The following message appears after modifying an execution package.
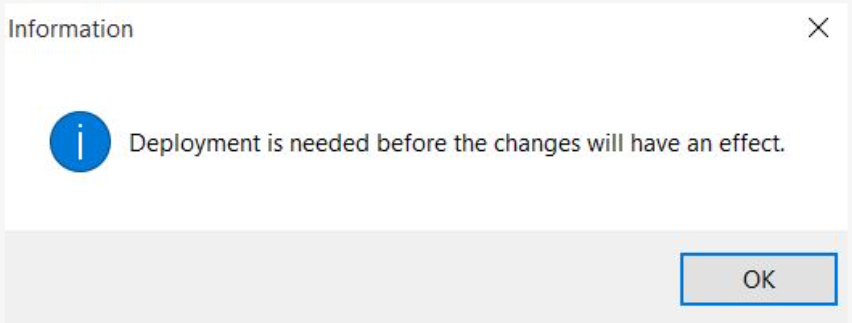
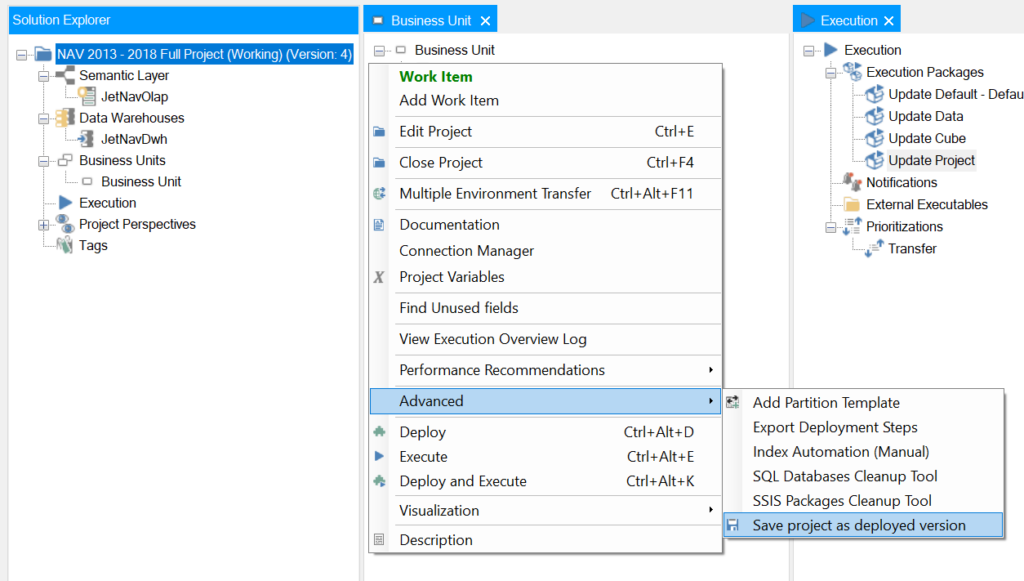
To commit the changes we must save the project as a deployed version. To do this right click on the project name → Advanced → Save project as deployed version.