Overview
This article explains the procedure of creating a basic dimension/measure and adding it to a cube. We will explain the concept about the logic behind our actions in detail. This will provide the foundation for creating measures, dimensions and cubes that fit your specific needs. The building of dimensions and measures can often become complex, and in this article, we will touch only upon some of its components.
Introduction
Before we start creating measures, dimensions and cube, it is important to understand some basic concepts.
- What is a Measure?
Simply put, a measure is a numeric value that is of interest.
For example: cost is an important numerical metric that we wish to measure and perform analysis on. - What is a Dimension Table?
A dimension table is an object in the data warehouse which contains our master data.
For example: if I want to see the total cost of items, I would want to store the item data into a dimension table. Data that I might want to capture could include the item Number, Name, Category, etc. This dimension table will share a relationship with our fact table. - What is a Fact Table?
A fact table is an object in our data warehouse that contains transactional data.
For example, if I want to see sales by employee, I would want to store the sales data in my fact table. This fact table shares a relationship with our dimension table.
Building a Dimension Table
We are starting with a blank project and connecting to a NAV database, but the logic is the same regardless of your data source.
- Open the Jet Data Manager.
- Open your current project.
- Once opened, navigate to the Data Sources node and select the data source.

All data is fed into the project through a source database. Data is chosen from our source database and placed into the staging database.
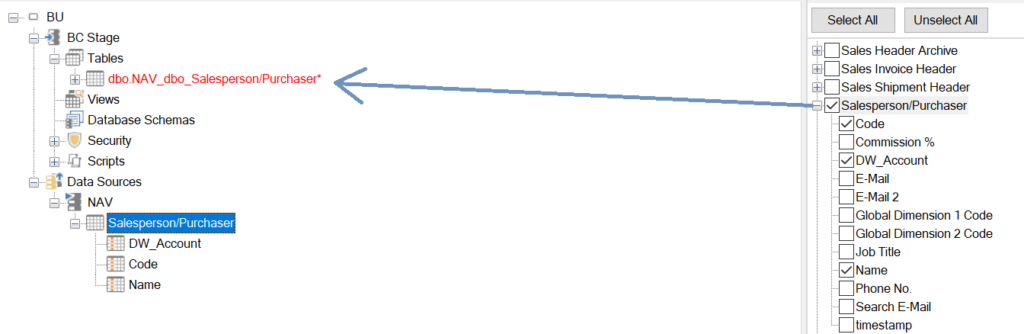
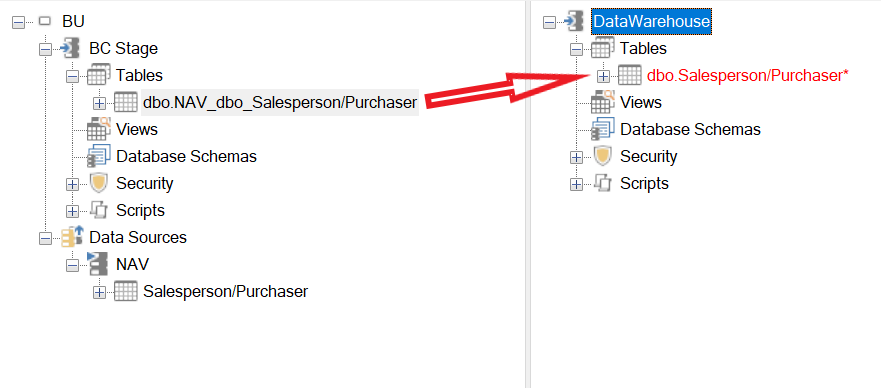
- In this example we have selected the salesperson data that resides in the Salesperson/Purchaser table.
- We will select the Name and the Code field.
- We will use the Code field and link it to a fact table that we will create later.
- Also notice that the table has been added to my staging database.
- The best practice is to only add fields that you need. Adding unneeded fields will increase the processing time.
- You may notice that when you select any field in a table, a field called DW_Account is also selected (NAV and GP only). This is used to differentiate between companies when working in a multi-company environment. DW_Account must be selected if present.
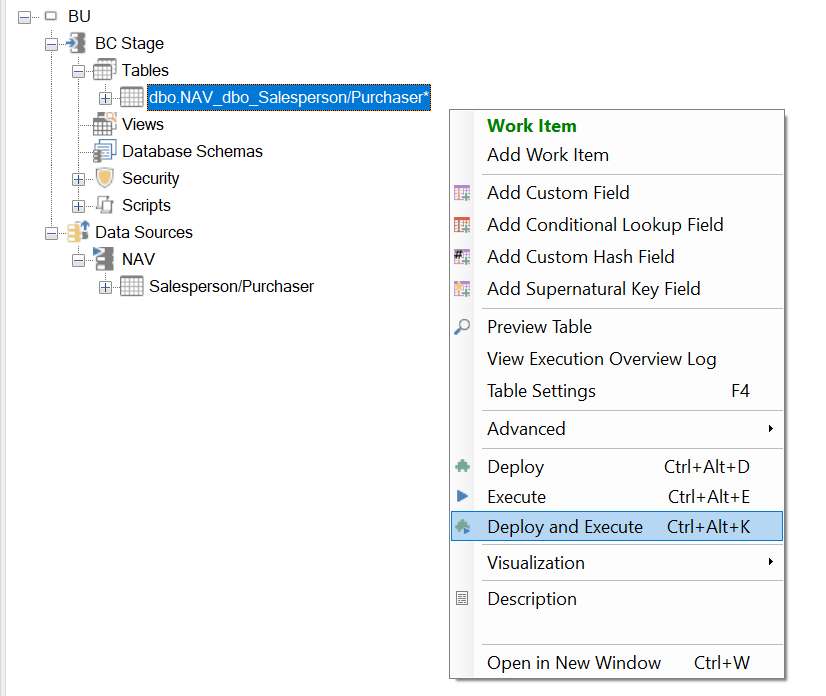
- After adding the table to the staging database, you will need to deploy and execute that table. To do this, right click the table and select Deploy and Execute.
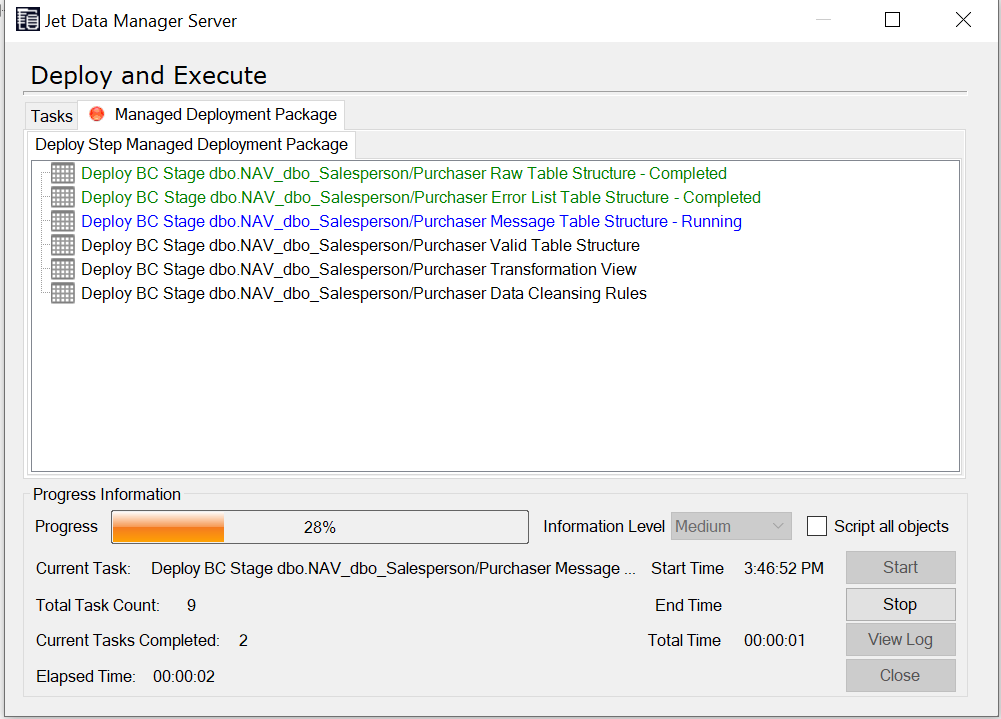
- A dialog will appear. Click Start.
The table must be deployed and executed any time a structural change is made. For example, when you add another field, or you place a rule on the table.
- Drag the dimension table from the staging database into the data warehouse.
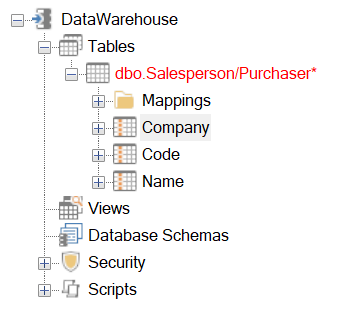
- Expand the table in the data warehouse. This will show the fields inside the table. Rename the field names to something more meaningful. In this example, we changed DW_Account to Company as to better represent the contents of the field.
- To change a table/field name, right click the object and select Edit.
- It is a best practice to remove all special characters from table and field names.
- Deploy and execute the table in the data warehouse as we did above.
👉 Join our Jet Analytics Training and master building data warehouses, cubes, and advanced dashboards.
Building a Fact Table
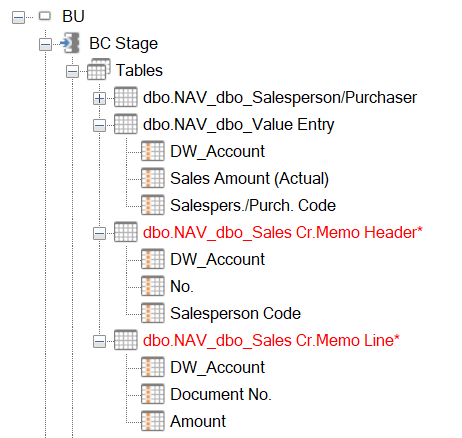
We know our fact table will contain our numerical data and a field that will link to our dimension table. Currently, we are only interested in looking at sales that have been posted. In our NAV database we will want to pull the sales amount from the following tables.
- Sales Cr.Memo Header
- Sales Cr. Memo Line
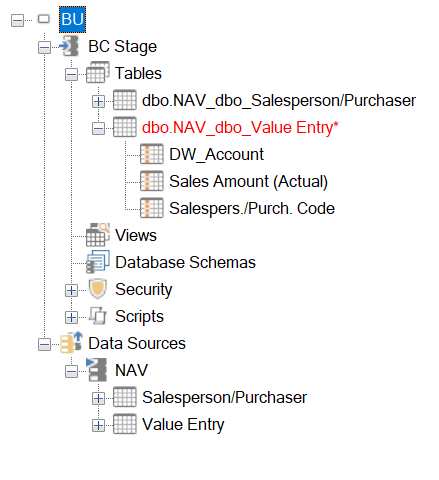
- Value Entry
Adding the Value Entry Table
- Select the table that contains your numeric data after navigating to your data source. In our example we have selected Sales Amount (Actual) field and the Salespers./Purch.Code fields from the Value Entry table. Salespers./Purch.Code will link our dimension table to our fact table.
- Deploy and execute the table.
- Drag the table from the staging database up to the data warehouse.
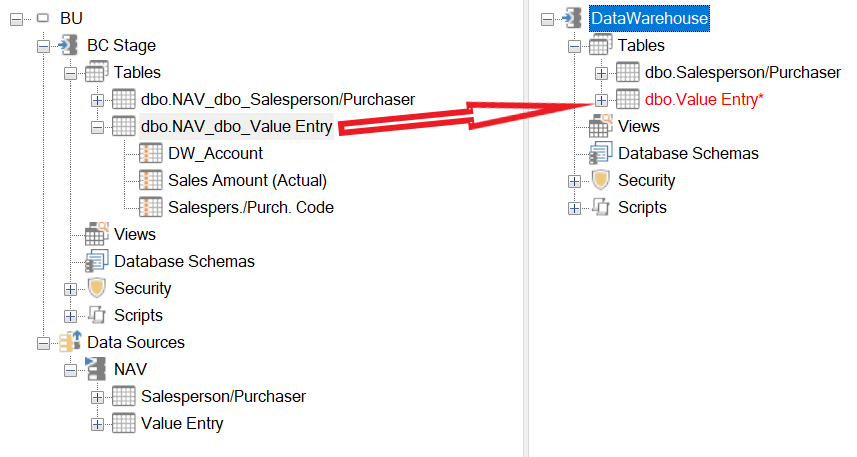
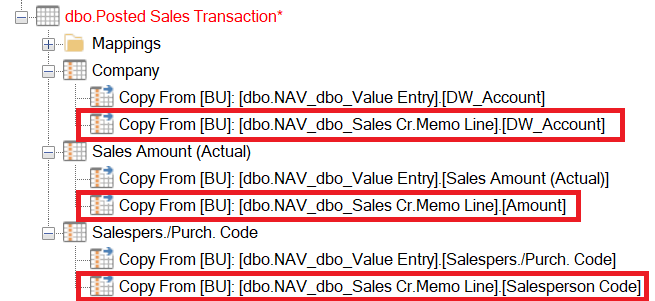
- We will rename the table as Posted Sales Transaction because that is what the table will contain. Expand the field to view the data movements. We can tell that the data is being pulled from the Value Entry table and the associated fields in this table.

Adding the Sales Credit Memo Header and Line Tables
We have two tables that contain the data we need
- Sales Cr. Memo Header
- Sales Cr. Memo Line
- The header table contains the Salesperson Code field which we need to properly link our fact table to our dimension table.
- We also want to grab the No. field as this will be used to link the Header and Line tables.
- The Line contains numerical values about our transactions.
- We want to grab the Amount field and the Document No. .Document No. will be used to link the header table to the line table (the No. field from the header = the Document No. field on the line).
- Navigate to your data source and add the fields. Once your fields are selected, they will appear in the staging database.
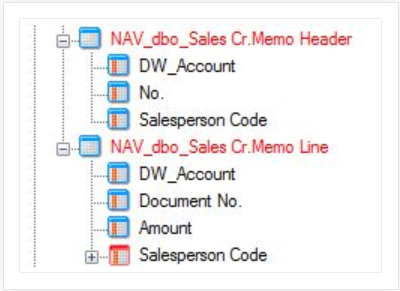
- We need to get data from one table to another, so we create a lookup field. To do this, we drag the Salesperson Code field from the header to the line (drag the field that contains the data you want from table A on top of table B). This will create a lookup field that displays in red.
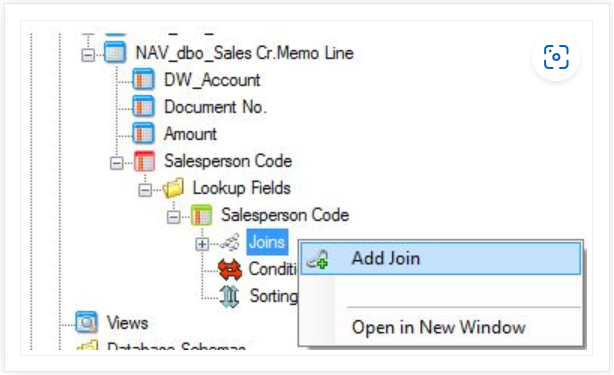
- We now have to tell the Jet Data Manager how these two tables are related to each other by creating a table join.
- Expand the newly created lookup field all the way and right click and select Joins and then Add Join
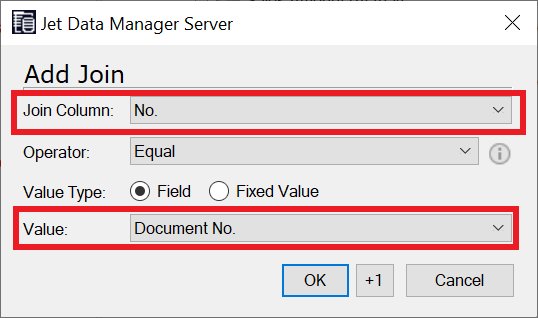
- In the Lookup field drop down, select the No. field from the header table. In the Field drop down select Document No. Click OK.
- We have now logically joined the two tables together.
- Deploy and execute the Sales Cr. Memo Header table first and then the Sales Cr. Memo Line table
- Drag the fields from the Sales Cr. Memo Line table in the staging database to the corresponding field in fact table in the data warehouse.
- Deploy and execute the fact table.
Creating a Cube and Measure
After successfully creating our dimension table and our fact table, we can now proceed to create our cube and dimension.
Creating a Cube
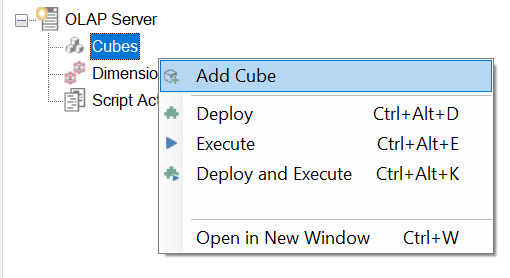
- Navigate to the Cubes tab.
- Expand your OLAP Server, right click on Cubes, and select Add Cube
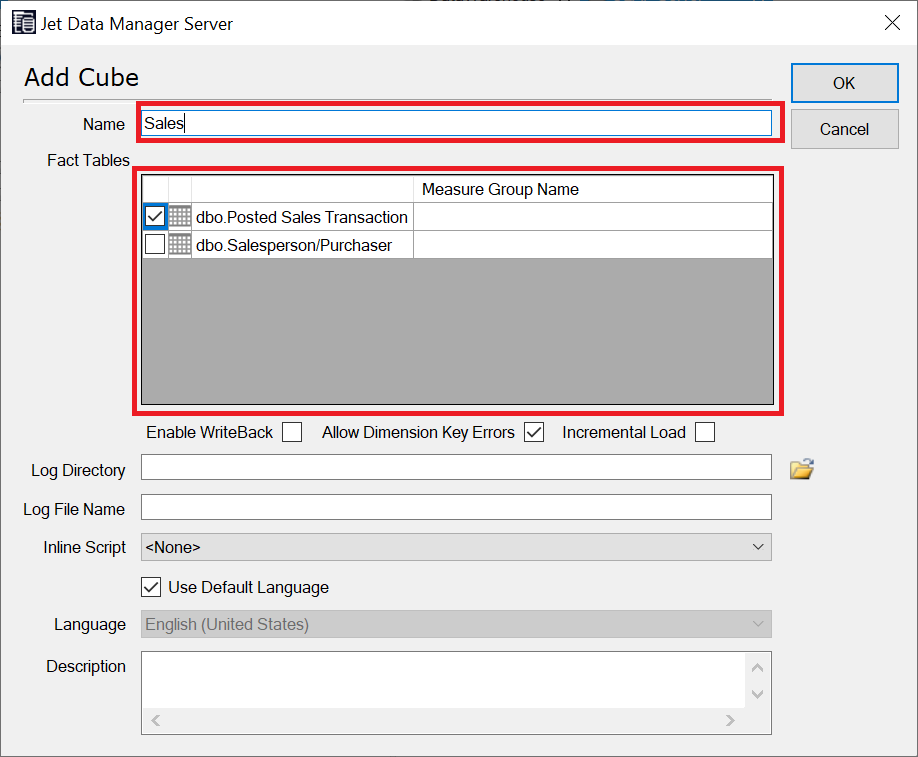
- The Add Cube dialog will open. Select your fact table and enter a name for your cube. Click OK.
Creating a Measure
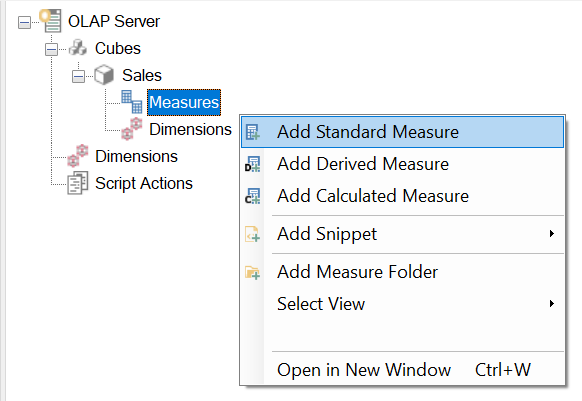
- Expand the cube you just created, right click on Measures and select Add Standard Measure
- The Add Measure dialog will open. Enter the appropriate information and click OK.
- Name: Assign a name for your measure
- Fact table: Select the fact table that contains your data
- Field: Select the field that contains your numerical data
- Type: Select the operator. In this example we want to sum the data
- Format string: Select how you want your measure formatted
Creating a Dimension and Adding it to a Cube
- From the Cubes tab, navigate to the Dimensions node, right-click on it, and select Add Dimension.
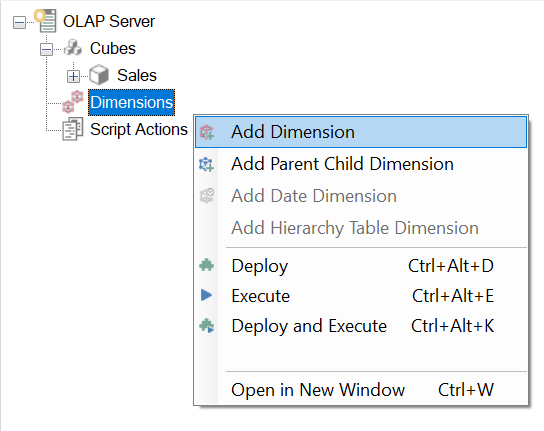
- The Add Dimension dialog opens. In the Name field, enter a name for your dimension. Click OK.
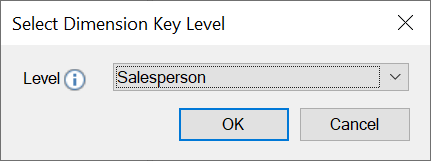
- The Dimension Level dialog opens. Enter the appropriate information → Click OK .
- Name: Enter the name of the dimension level as you would want it displayed to the end user. In this example, we will name it Salesperson.
- Key Table: Select the dimension table that contains your data
- Key Column: Select the field in your dimension table that relates to your fact table. In our example, the code field in the dimension table equals the Salesperson code in the fact table.
- Lay-Out: Select how you want your field to appear to the end user. In this example, we have a field called Name in our dimension table. This field contains the names of all our sales people and this is the value we want to display to end users.
- Name Table: Select the table that contains your data. This is usually the same table as the Key Table.
- Name Column: Select the field in your dimension table that contains the data you wish to display.
- Sort By: Select how your results should be sorted. In this example we will sort by Name.

- Make sure that your dimension has a key level. This is the level that we will use to link our dimension to our cube.
Adding a Dimension to the Cube
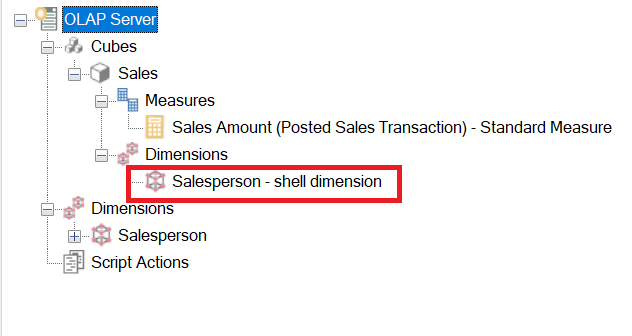
Once our dimension is created, we can add it to an existing cube.
- Drag the dimension you want to add to the Dimension node within your cube. This will create a shell dimension.
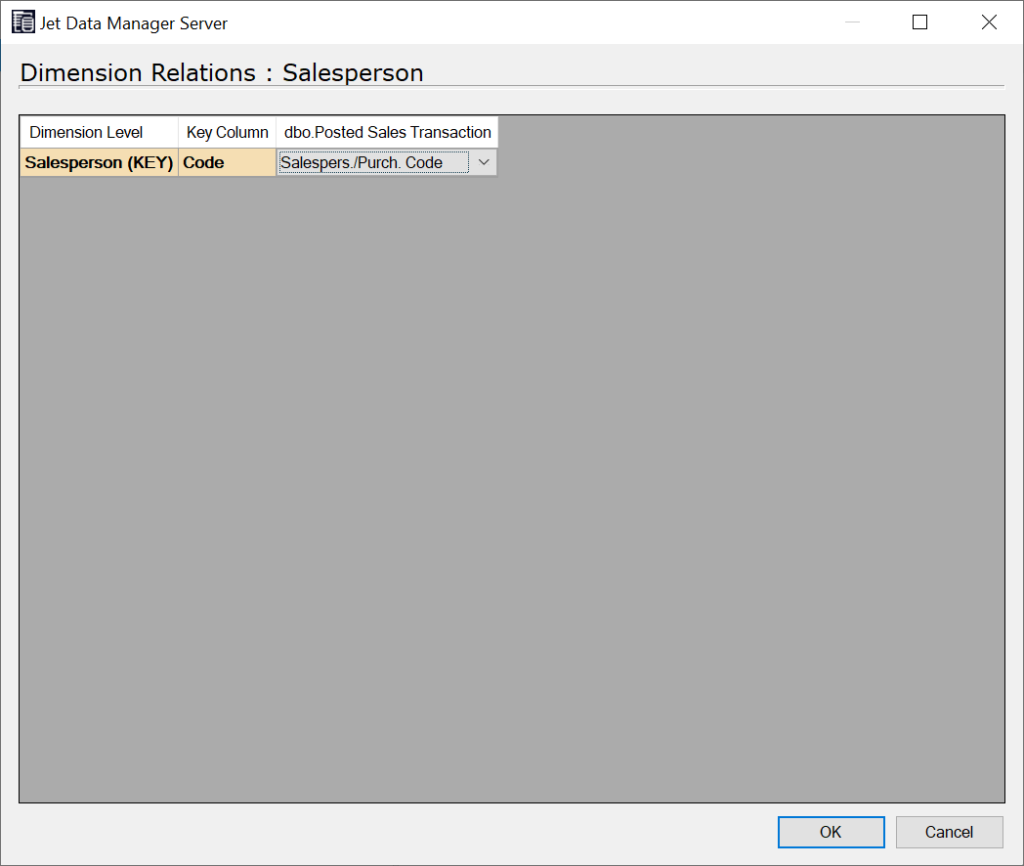
- Right click the shell dimension, select Dimension Relations, and then select the fact table you wish to link it to.
- In this example, we want to link our dimension to our posted transactions fact table.
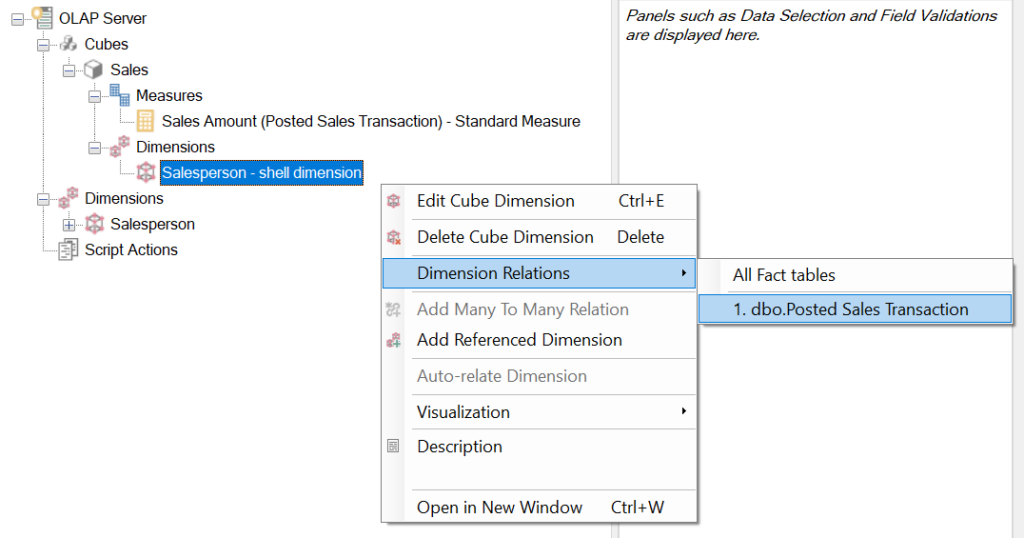
- Under your fact table, select the field that links your dimension table to your fact table.
- In this example, Salespers./Purch. Code in the fact table equals Code in our dimension table. Click OK.
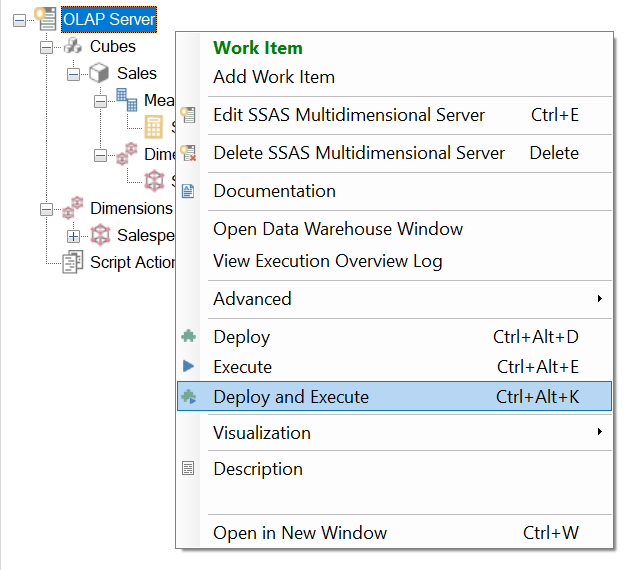
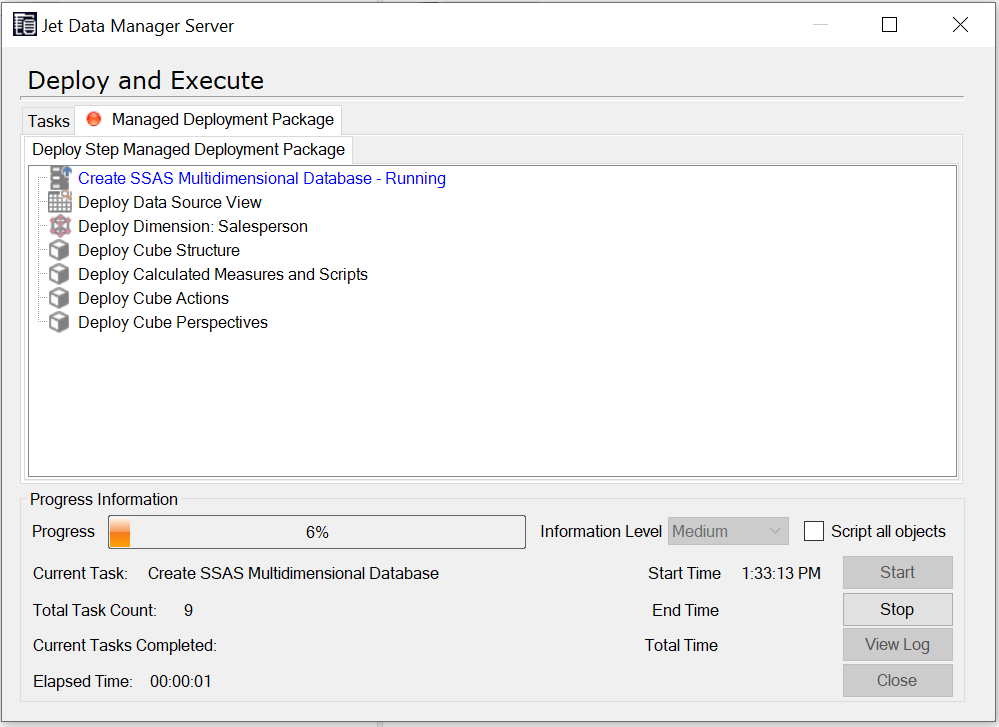
- The final step is to deploy and execute the OLAP Server.
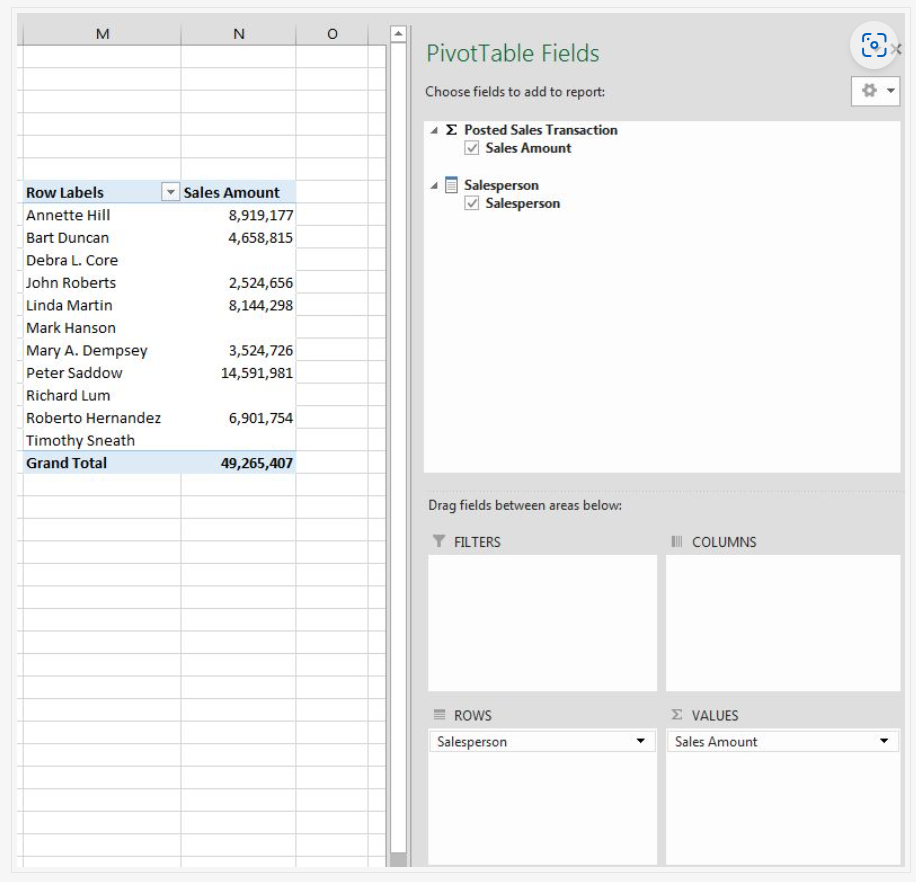
Expected Results
When we look at our results via a pivot table, we can see the measure we created and the dimension. We can see our salespeople and the total amount each has sold. It looks like Peter Saddow has the highest Sales Amount.