
Creating a custom API in Power Apps allows you to define your own logic and expose it as an endpoint that can be used in apps, flows, or other integrations. Here’s a step-by-step guide to help you get started—perfect if you want to build more control and flexibility into your Power Platform solutions.
Pre-requisites:
Make sure you’re working within a solution in Power Apps.
Ensure the solution has a publisher with a customization prefix (e.g.,
sample_).Plan your API design well—some fields can’t be changed later.
Step-by-Step: Create a Custom API
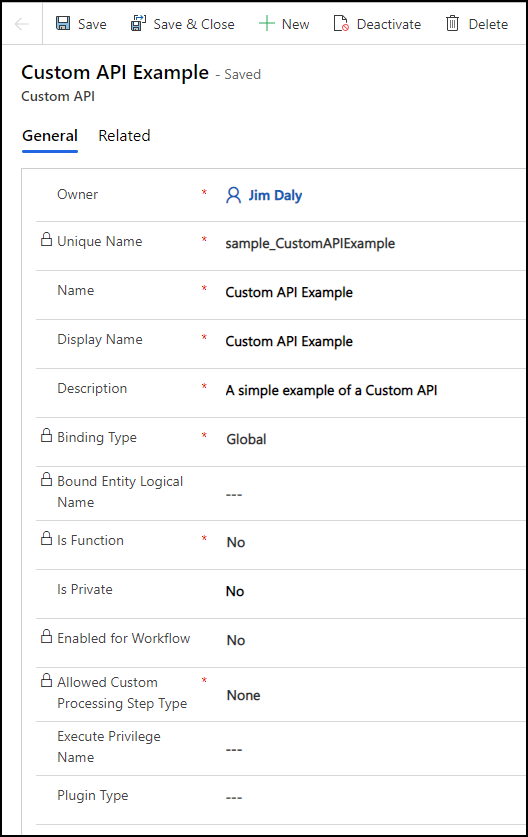
1. Create the Custom API Record
Inside your solution, go to New > More > Other > Custom API.
Fill out the required fields such as:
Name (with prefix)
Binding Type
Bound Entity
Is Function or Is Action
Save your custom API.

2. Add Request Parameters (Optional)
Go to New > More > Other > Custom API Request Parameter.
Define the fields needed to pass data into your API.
Save the parameter.
3. Add Response Properties (Optional but required for Functions)
Go to New > More > Other > Custom API Response Property.
Define what data your API will return.
Save your response setup.
4. Check It in Metadata
Open a browser and go to:
https://yourorg.crm.dynamics.com/Search for your API name (e.g.,
sample_CustomAPIExample).You’ll see your defined parameters and return types in the XML.
👉 Join our Power Apps Training for expert-led, hands-on learning.
5. Add Your Plug-in Logic (Optional but powerful!)
If you want your API to run logic:
Write your plug-in (using C#).
Register it using the Plug-in Registration Tool.
Set the Plug-in Type lookup in your Custom API form

Once everything is set, you can test your custom API using tools like Postman, Power Automate, or directly in your app. You can also use the Custom API Designer inside the Plug-in Registration Tool for a visual way to build APIs, or even automate the process using code or solution files for ALM.


