Easily automate your reporting process with scheduled reports in reports center—save time, stay informed, and keep your team in the loop effortlessly.
Scheduling Reports in the Reports Center
To automate report delivery, you can schedule reports directly within the Reports Center. Follow these steps to create and manage report schedules:
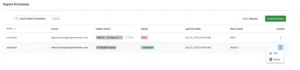
Step 1: Access the Report Schedules Page
1. Navigate to Report Schedules.
2. The Report Schedules page will appear, displaying a list of all current schedules with the following columns:
-
-
Name: The title of the schedule.
-
Owner: The creator of the schedule.
-
Report Name: The associated report(s). If multiple reports are attached, a “+ X more” link appears for additional items.
-
Status:
-
Error (Red): The last run encountered an issue.
-
Never Run (Gray): The schedule hasn’t executed yet.
-
Completed (Green): The schedule executed successfully.
-
Active (Blue): The schedule is currently running.
-
-
Last Run Date: Timestamp of the most recent execution.
-
Recurrence: Frequency of the schedule (e.g., Daily, Weekly, Monthly).
-
Actions: The three-dot menu allows you to Edit or Delete the schedule.
-
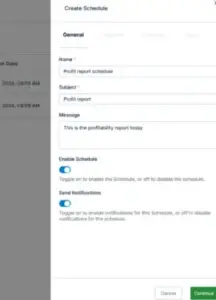
Step 2: Create a New Schedule
3. Click Create Schedule. The Create Schedule window opens.
4. On the General tab, provide the following information:
-
-
Name: Enter a unique name for the schedule.
-
Subject: Required. This will be the email subject when the report is shared.
-
Message (Optional): Enter an optional message to include in the email.
-
Enable Schedule: Check this box to activate the schedule.
-
Send Notifications: Enable this to notify users when the report is sent.
Click Continue to proceed to the Reports tab.
-
👉 Join our Jet Reports Training and learn to create real-time, dynamic reports with confidence.
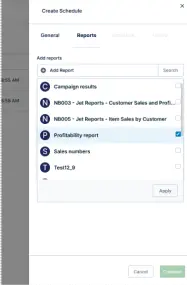
Step 3: Add Reports
5. Click the Add Report box. A list of available reports will appear.
6. Select the desired reports and click Apply, then Continue.
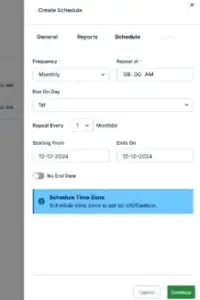
Step 4: Configure the Schedule
7. On the Schedule tab.
8. Define when and how often the reports should run:
-
Frequency: Select how often the report should run (e.g., Daily, Weekly, Monthly).
-
Start at: Choose the start time for the schedule.
-
Repeat Every: Define the recurrence interval.
-
Starting From: Choose the start date.
-
Ends On: Set the end date, if applicable.
-
No End Date: Select this option if the schedule should run indefinitely.
Note: The default time zone is UTC. To update your time zone, go to your Profile Page. For more details, see Update Profile.
9. Click Continue to proceed to the Users tab.
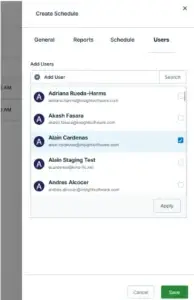
Step 5: Add Users
10. Click the Add Users box. A list of available users will appear.
11. Select the users to receive the scheduled reports and click Save.
Your report schedule is now set up and will run according to the configured settings.


