If you are wondering how to connect Power BI to Claude Desktop, the Model Context Protocol (MCP) server allows you to manage your data models using natural language. This guide provides a professional walkthrough for configuring this environment.
What is an MCP Server?
The Model Context Protocol (MCP) is an open standard that enables developers to build a secure, two-way bridge between AI models and local or remote data sources. Think of an MCP Server as a universal translator for AI: it takes the “brain” of an LLM (like Claude) and gives it “hands” to interact with specific software like Power BI, this is exactly what Power BI MCP Claude setup does.
Prerequisites
Before you connect power bi to claude, ensure the following software is installed on your workstation:
- Claude Desktop
- Visual Studio Code (VS Code)
Step 1— Install the Power BI MCP Extension
This is the core Powerbi mcp claude extension you will need for rest of the guide.
- Open VS Code
- Go to the Extensions panel
- Search for: “Power BI Modeling MCP Server
Step 2: Install the Power BI MCP Extension in Claude
To use power bi mcp server in claude you must bridge the gap between Power BI and your AI agent, you must first install the necessary extension within VS Code.
- Launch Visual Studio Code.
- Navigate to the Extensions panel on the sidebar.
- In the search bar, enter: Power BI Modeling MCP (Analysis Services).
- Select the extension and click Install
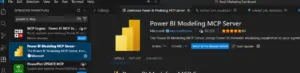
Step 3 — Locate the Power BI MCP Server Installation Path
After installation, your claude mcp power bi extension is stored locally on your system. Go to the following path: %USERPROFILE%.vscodeextensions Locate the folder beginning with analysis-services.powerbi-modeling-mcp 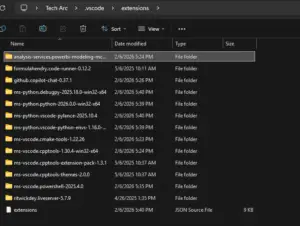 Then click the server folder
 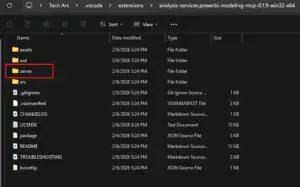 Find the powerbi-modeling -mcp file
 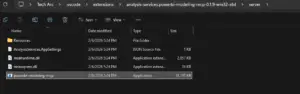 Copy the full file path of this executable and save it in a text editor for use in the next step.
Step 4: Configure Claude Desktop with Power BI MCP
To connect Claude to Power BI Desktop, you must now inform Claude Desktop where the MCP server is located by editing its configuration file:
a. Open Claude Desktop and navigate to Settings.
b. Select the Developer tab and click the Edit Config button. 
This action opens the configuration folder. Open the claude_desktop_config.json file in a text editor like Notepad.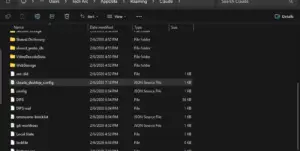
Input the following JSON structure, ensuring you replace the command value with the path you copied in Step 2 { “mcpServers”: { “powerbi-modeling-mcp”: { “command”: “Paste Path Here Replace with “, “args”: [“–start”], “type”: “stdio” } } } Now Paste the Path that you copied earlier inside double quotes
Important: In the JSON file, you must use double backslashes () for the file path to be valid
SAMPLE: { “mcpServers”: { “powerbi-modeling-mcp”: { “command”: “C:UsersTech Arc.vscodeextensionsanalysis-services.powerbi-modeling-mcp-0.1.9-win32-x64serverpowerbi-modeling-mcp.exe”, “args”: [ “–start” ] } } Save the file (CTRL + S) and restart your computer to initialize the server.
👉 Join our Power BI Training and gain hands-on skills to turn insights into action.
Step 5: Verification and Implementation
After your system restarts, you can begin interacting with your Power BI models directly through Claude.
Establishing a Connection
Top connect claude to power bi, open your Power BI file (e.g., “Account Receivables”) and Claude Desktop. Use a prompt such as: “Connect to my opened Power BI file named Account Receivables.” 
Claude will confirm the active connection and list the operations it can perform, such as creating measures or running DAX queries.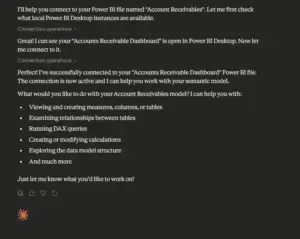
Example: Automating Model Tasks
You can now automate complex modeling tasks through simple natural language commands:
- Create Tables: “Create a new calculation table called ‘KeyMeasures 2’ as a dedicated measures table.”


- Generate Measures: “In the table ‘KeyMeasures 2’, create financial balance measures for Opening, Ending, Overdue, and Current balances.”


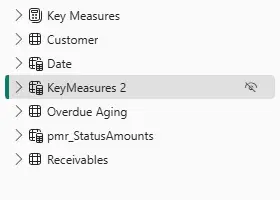

The measures will be generated instantly within your Power BI model, ready for use in your reports.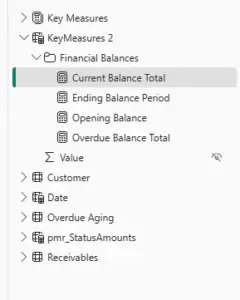 And it is working correctly.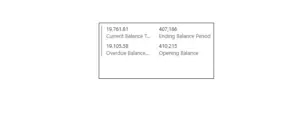
With your Claude Power BI MCP setup complete, you can now interact with Power BI more efficiently using natural language from querying data and working with models to creating measures. If you experience connection issues, revisit Step 4 and make sure the Power BI MCP server configuration path in Claude uses double backslashes. With everything configured correctly, you’re ready to streamline your Power BI workflow with AI.