Power Apps lets you run model-driven or canvas apps on your Windows device. If you’re ready to use Power Apps on your computer, here’s a quick and simple guide to help you get started. First you need to install Power Apps for Windows using given methods:
Install Power Apps from Microsoft Store
Open the Microsoft Store on your Windows device.
Search for Power Apps for Windows.
Click Install.
Once installed, open the app and sign in with your Microsoft account.
Having Trouble Installing?
If the app crashes or doesn’t install properly, or if you see an error like “Update Microsoft Edge”, don’t worry. This usually means that your device is missing something called WebView2 Runtime, or you have an older version of it installed.
What is WebView2 and Why You Need It?
WebView2 helps Power Apps run smoothly. If it’s not installed, or if you’re using a version older than 99.0, Power Apps might crash or not launch at all. You’ll need to check if WebView2 is installed and update it if necessary.
Check Your Current Version:
Go to Settings > Apps > Apps & features.
Search for WebView.
If it’s not there, or the version is older than 99.0 — you’ll need to install it.
How to Install WebView2:
Note: You need admin rights on your device to install this. Ask your IT admin if needed.
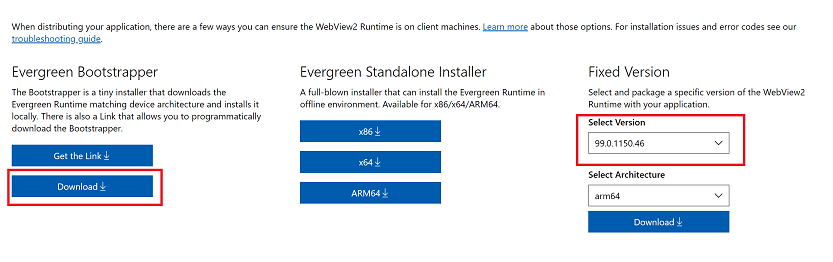
Under Evergreen Bootstrapper, click Download.
Review the license terms and click Accept and Download.
Run the file:
MicrosoftEdgeWebview2Setup.exe.
Once done, try launching Power Apps again — it should work just fine!
👉 Join our Power Apps Training for expert-led, hands-on learning.
Alternative Installation: Use App Center
If you can’t access the Microsoft Store you can install power apps for windows using app center:
Head over to Power Apps App Center to install it manually.
Admins can also download and deploy the app to users using Microsoft Intune.
Power Apps for Windows is a great way to access business apps directly from your desktop. Follow the steps above, and you’ll be up and running in no time!


