Below are the steps to follow in order to capture and log errors occurring in the Jet Hub And Jet Service for Tier Logging.
Enable Logging with the Jet Administration Console
- In order to Enable Logging, we first need to open the Jet Administration Console and click the Connect button.
- Click the checkbox for ‘Enable Service Logging‘.
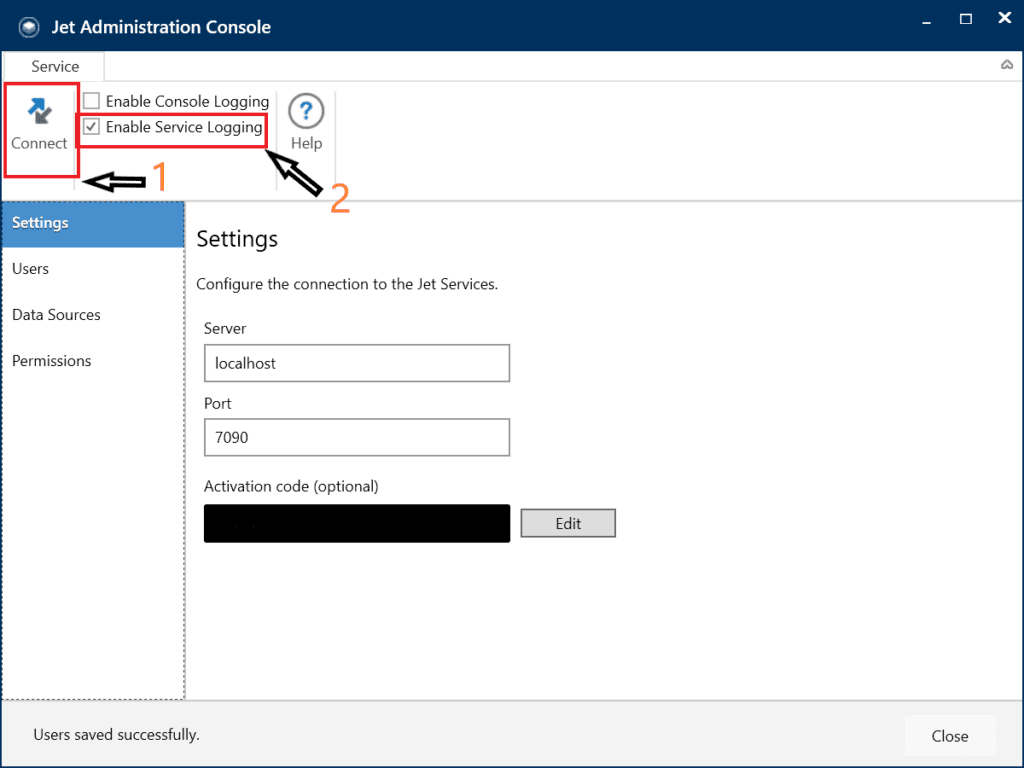
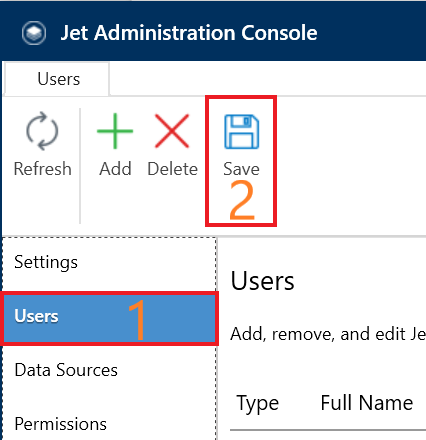
- Switch to the Users tab and save your settings.
Enable Logging with the Jet Hub
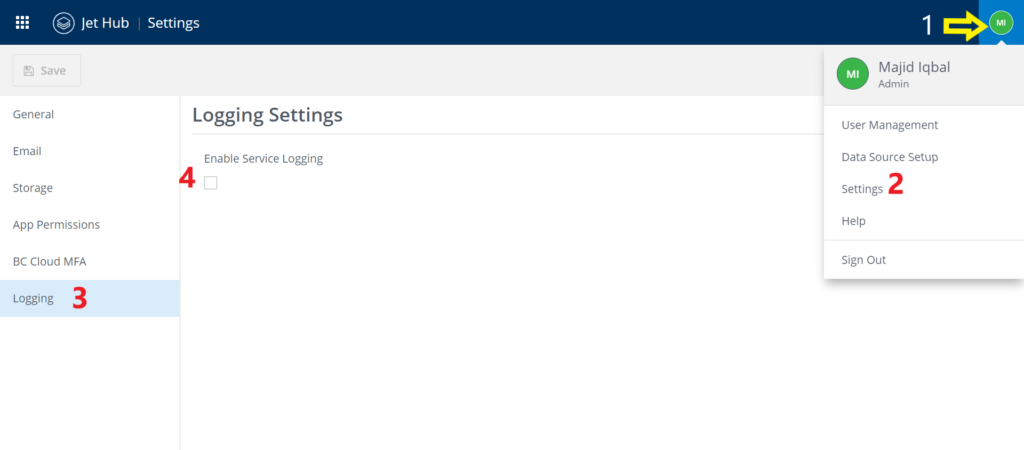
There is also an option to enable logging within the Jet Hub. You will need Jet Admin privilege to do so.
- In the upper right corner, select the green icon with the Jet user’s initials.
- From the drop-down list, select Settings.
- On the left side, select Logging from the available choices.
- Select the check field to toggle logging on.
👉 Join our Jet Data Manager Training and learn to build, manage, and automate your data warehouse with ease.
Location of Service log file
The log file can be generated at 2 different places.
1) The log file will get generated on the Jet Service Tier server in the location mentioned below, while running the Jet Service Tier service as ‘Network Service‘.
C:\Windows\ServiceProfiles\NetworkService\AppData\Roaming\Jet Services
2) While using a dedicated service account, the log file will be generated on the Jet Service Tier server in the following location.
C:\Users\username\AppData\Roaming\Jet Services
To open the log file(s) Debugging Tools for Windows must be installed via the Microsoft Windows SDK.
This installs the Windows Service Trace Viewer found in C:\Program Files (x86)\Microsoft SDKs\Windows\v8.1A\bin\NETFX 4.5.1 Tools
Microsoft Windows 10 SDK


